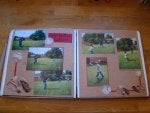
Scrapbooking is a hobby I picked-up about 11 years ago. When I started out, a table and chair in a small area of the basement was all the room I needed. As my collection grew, so did the need for more space and more storage.
Here are a few 'before' shots of the room I remodeled to use for my scrapbooking, rubber stamping and computer. It's also used for arts & crafts for my daycare kids.
The original doors were more like closet doors. They were attached to a track at the top of the doorway. They were heavy and not secured to anything at the floor level. So when one of the kids pushed on the bottom, the doors would sway back and forth. One day one of them came off the track and fell. That was the end of those doors.
I replaced them with the french doors. This was my first attempt at installing double doors.
A few years ago, when I was putting laminate wood down to replace the flooring in the living room, kitchen, dining room, hallway and bedrooms, I decided to just continue it into this room too.
I had already taken the carpet out and replaced it with vinyl tiles a few years before, so the floor in this room was still in pretty good shape. But with the doorway being so wide, I thought it would look nicer to have the same flooring in the hallway and this room.
The color on the walls isn't as bright as it looks in the picture.