DIY Home Improvement Forum banner

Inlet vs Outlet?

12K views 18 replies 8 participants last post by  Wiredindallas  
#1 ·
I am learning as much as I can about electricity and have stumbled upon what I thought was a simple question but I cant find the answer through Google (perhaps Im using the wrong search terms). Basically, is there a difference between inlets and outlets other than the direction the electricity travels?

I am looking for a NEMA TT-30 inlet for my 8x10 tiny cabin in Vermont. Everything I find appears to be an outlet, not an inlet. Even when I search for inlets at Lowes/Home Depot most of what comes up are called outlets. Can I buy an outlet like this one and use it as the inlet for my cabin?

Thank you for educating me and sharing your wisdom!
Evan
 
#13 ·
Basically, is there a difference between inlets and outlets other than the direction the electricity travels?
No. The difference is the outlet has slots that are protected from curious fingers. The inlet has prongs sticking out!

The prongy side must be the user of electricity. Nobody cares if your coffee maker has prongs, they can't kill you because coffee makers use electricity, not generate it. Get it?

Imagine if AC power outlets in your home had prongs instead of slots. That would be bad.

If you put the "outlet" (sockets) on the side of your tiny home, that means the supply must have prongs. That's the bad thing!

That forces you to make a "suicide cord" (a cord with prongs on both ends, guaranteeing one end is lethal when the other end is plugged in). Don't do that. Really.

I understand; using an outlet is obvious since they are cheap and readily available, and inlets are expensive and hard to find. You don't need to use an inlet. Your coffee maker doesn't use an inlet. It uses a cord. Feel free to put a cord on your tiny home. Put a junction box on the outside where you convert from in-house wiring (NM, UF) to flexible cordage. Stick a TT30 plug (or L5-30P plug) on the cable. Make the cable short, just a foot or two, so it won't fall or drape where it could take damage. Then use an extension cord from there.


Now if @joe-nwt could explain to me why in the heck they came up with TT30 when we have 5-30, I'd be happy lol
Yeah, there's an XKCD for that...
 
#18 ·
I have found a lot of old posts helpful and often wish the OP would return with an update regarding what they did and how it worked out. In case it helps anyone out in the future, here is what I did!

Turns out that the Square D QO sub panel (I did upgrade to the 8 space panel on @seharper's advice) has main lugs that ARE rated for 8 gauge wire, unlike what the rep told me. And, along the same times, the RV inlet I purchased that supposedly only took 10 gauge wire came with instructions to use either 8 or 10 gauge. So I was able to run 8 gauge straight from the inlet to the sub-panel without any issues. Hurray! Im currently sitting in my cabin, lights on, laptop charging, heater blaring in 0 degree weather and its glorious!

Best of luck everyone!
 
#8 ·
TT30 is an RV only receptacle. It's functionally the same as the 5-30 receptacle, just with the blades in a different configuration.

I linked an inlet (30 amp 125 volt locking inlet) and matching cord (30 amp 125 volt twist lock to TT30 cord cap). You don't have the buy the exact ones I linked, but yes, any cord that fits the inlet and has the appropriate end for you will work.

Now if @joe-nwt could explain to me why in the heck they came up with TT30 when we have 5-30, I'd be happy lol
 
#10 ·
Can I buy an outlet like this one and use it as the inlet for my cabin?
Absolutely NOT!!
That is an outlet. You would need a cord that is referred to as a "suicide cord" to make that work.
You want an inlet that would accept the female end of a cord, not the other way around.
 
  • Like
Reactions: NewTinyBuilder
#12 ·
@joe-nwt and @Nealtw amazing, thank you for explaining that, I will definitely go with the twist lock. Sounds like a much better option.

@Kevin_Essiambre thank you so much for those links! And for explaining the different configurations, that makes a lot of sense. Lol I wish I knew the answer but I will definitely be looking for the 5-30 now that I learned about it.

@jbfan thank you for confirming that the one I found would also work. Trying to find one locally or that ships quickly while on a budget. I will make sure to get the appropriate cord.

@Missouri Bound thank you for educating me! I will definitely get a dedicated inlet now that I know the difference.
 
#2 ·
#6 ·
#7 ·
@Nealtw @joe-nwt @Kevin_Essiambre thank you for helping me out. Aha! I think I understand, tt30 was recommended but isn't necessarily the numbers for the inlet. Could I i use something like this which is a twist lock? I assume I would just get an adapter for it? I'm not sure I fully understand the different nema numbers but tt30 was recommended in a previous thread.
 
#14 · (Edited)
Thank you for this reply @seharper ! I have been learning a TON about electricity this past week, a lot of it inspired by what you have shared here on this thread. Here is where I am currently - I would love any advice or insight you have, and also want to share it here in case people in the future look to this thread as a resource. I know I have learned a lot looking through old threads and always appreciate when people update with their progress!

I have ordered this 30A/120V inlet and these 3" stainless pan head screws to mount it on the side of the tiny house (through 1.5" of foam insulation, 1/2" sheathing, and 2 of the screws into a stud). I will use 10-2 romex to connect the inlet to this Square D QO 100 amp load center. The 10-2 romex sheathing will be removed just to the interior side (inside the sub-panel) of these strain reliefs. A short section of sheathing will be labeled and slipped back over the hot wire only to help identify the circuit later. The load center will be installed on a wall next to the exterior door such that, when the door opens into the house, it does cover the sub-panel. I understand this placement is hotly debated because of the working requirements of NEC 110.26 but seems to be an OK (and sometimes preferred) place to install the panel. With such a small space it might be the best option? It will be wired as a sub-panel with this ground bar, separated from (not bonded to) the neutral bar. The load center will have two QO 20A dual GFCI/AFCI breakers. One breaker will lead to the heating elements, either two 750 watt Cadet baseboards or one 1500 watt Com-Pak plus in-wall heater. The other breaker circuit will lead to 4 outlets and one overhead light. All circuits will be wired with 12-2 romex, which runs through holes drilled out in the middle of studs. All romex cable will be stapled (no more than 2 cables per staple) within 12 inches of the load center and boxes, and sheathing will be removed (where applicable) with this ripper. All outlet boxes will be air sealed with Box Shells. These nail plates will be installed where romex runs through studs. I have ordered these budget lineman pliers to help get the job done.

For now I plan to connect the whole system up to an outlet outside my brother in law's house using a heavy duty outdoor extension cord and plug adapter/dogbone for the inlet and draw minimal power. I may go ahead and install a 30a 120v outlet on the main house (5 feet away) if I want more power.

I am sure there are a LOT of details that I'm missing, and my plan is evolving as I learn more but I hope to start running wire later this week or next. Please share any thoughts, advice, or things to watch out for as I move forward! Thank you all so much. Evan
 
#15 ·
Sounds like a very thorough plan.

The working space needs to be kept clear. A passageway is a great place for it, i.e. somewhere you have to keep clear so you can move around. A door swing area sounds like a great place for a panel, I'm just surprised anyone would build a tiny house with a door swinging inward :)

The only thing I'd suggest, in line with the "Think BIG on panels" viewpoint of some of us, is go for the QO816 panel which has the same box size. It's like $6 more (pretty much a latté, as I often joke) and gives you 2 more spaces and 4 more circuits. Note the box cover already has 8 knockouts. That will also better position you if you ever have the opportunity to get a 240V/50A RV style connection.

Also, I'm fairly sure as an outbuilding you wil need a "main disconnect". I would use a 30A 1-pole breaker for that, then make it a 120V panel by installing a jumper between the two main lugs. This breaker needs a tie-down, it looks like the PK2MB tiedown will be able to tie-down two singles, so just tie down the "disconnect" and a regular breaker too. (doesn't matter if regular breakers are tied down).

Also, to make life easier when/if you are able to upgrade power input in the future, consider conduit between the inlet box and service panel. That way you can just change the wires without any demolition. Or you could just run 50A wires now, but that'd be NM-B 6/3 w/ground. (in conduit it could be #8).
 
#16 · (Edited)
Thank you @seharper Im glad the plan sounds thorough! Ive been learning so much, it feels like the accumulation of my learning up to this point.

Im happy to hear that you think it makes sense to mount the panel behind the door. Yeah, I wanted to do an out-swing door but then I realized it would make the door significantly more exposed. With the inswing door I have a little more protection of the doorway, since its recessed a few inches beyond the exterior surface of the wall. Figured I can always change the swing later on if I really want, but for now it seems to be OK. I will look into the QO816 panel, I didnt realize it was the same box size but now that I have the 6 space panel I can see how that works - If I had known that before I definitely would have ordered the 8 space panel.

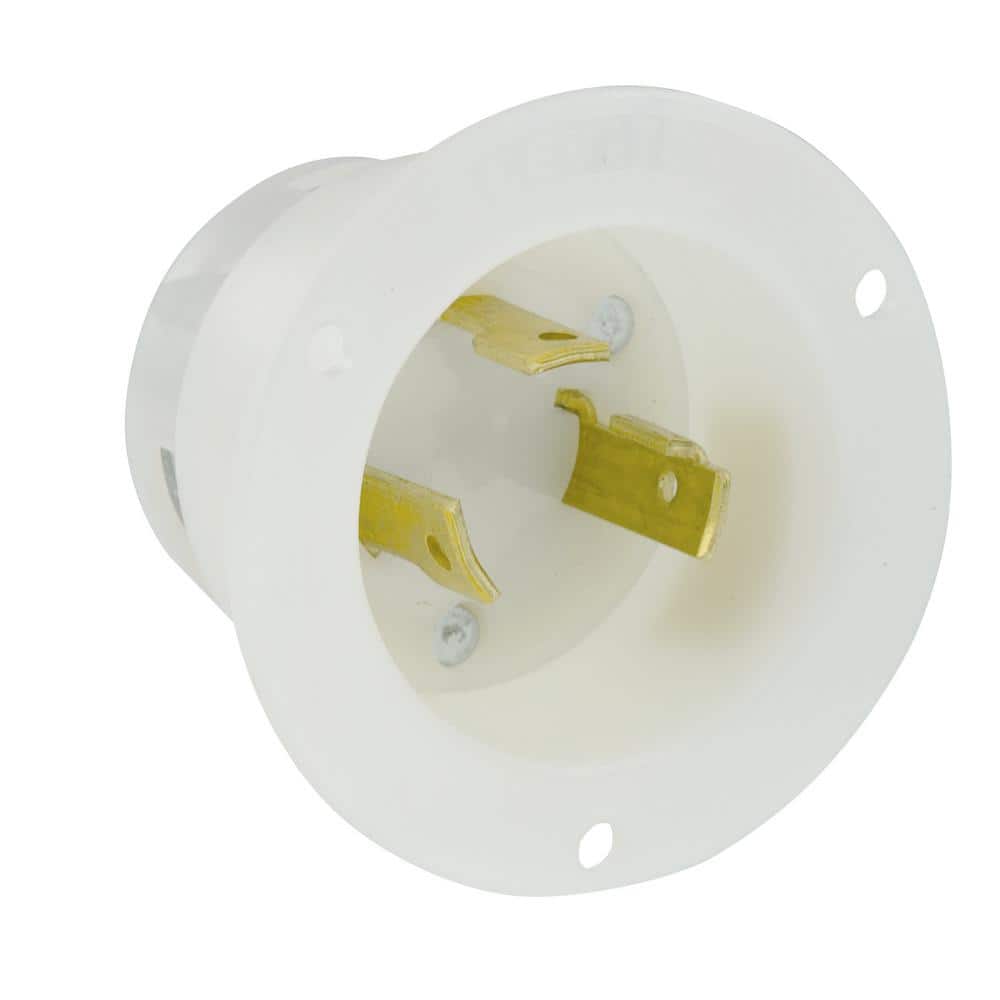
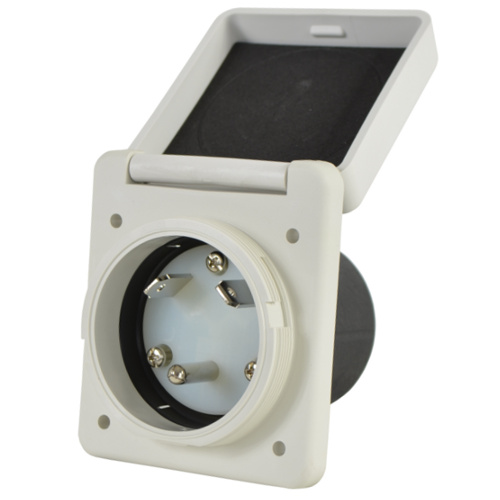
Panel-Inlet Compatibility Issue: I am looking at the 6 space panel I have right now and it says "main terminals suitable for No. 8 to No. 1 wire or 1/0 SE Compact stranded aluminum wire." My 30A/120v inlet calls for 10-2. I reached out to the supplier and they said it will not support 8 gauge wire. If it will fit 8 gauge wire I should be able to run cleanly from inlet to panel, but if not can I run the 10-2 romex from the inlet into the load center, then an inch or so into the panel, pigtail the hot to two 8 gauge wires and connect those to the hot bars to get the minimum thickness required by the load center and act as a jump, and pigtail the neutral from the 10-2 to 8 gauge for the neutral bar? Or, alternatively, can I run 10-2 wire from the inlet to a junction box below the panel and connect the 10-2 inlet wires (10-2 hot wire pigtailed to two 8 gauge hots, 10-2 neutral and ground to 8 gauge neutral and ground) to run up into the panel?

Aha! I didnt realize the need for a main disconnect. I have not yet learned what that entails (main disconnect, tiedown, jumpers, etc), I will have to look into it, thank you for bringing it to my attention. Always more to learn! Is the main disconnect basically an additional 1 pole 30A breaker that is installed first in the subpanel and connected with the tie down to the first 20A breaker?

My plan is to have the entire electrical system on 120V - the inlet is rated for 120V and only has room for one hot wire. From what Ive learned, wiring the sub panel with one hot wire would make it so that only half of the breakers are operational, unless I pigtailed/jumped the hot wire to both lugs. This might be what you were recommending in your post? If I dont jump/pigtail, would that lead to load balancing issues? If I dont jump/pigtail the hot, I imagine I would only have 3 spaces (half of the 6), which could be another reason to upgrade to the 8 space panel. Would you recommend moving forward with only using half of the breakers, or with jumping/pigtail to get power to both sides of the box?

Good call on using conduit in case of a future upgrade. I will look into sourcing that and how to install it. I see this 1/2" flexible PVC conduit, I imagine I could just order some of this and a few 1/2" strain reliefs for where it connects up to the panel? Then I could always upgrade the wire, or just run #8 romex in the conduit to begin with.

Phew!! More to look up, thank you!
 
#17 ·
Update: I called the Square D QO load center company and they said that the minimum wire accepted by the load center is 6 gauge. They suggested that I run the 10-2 romex from the inlet on the outside of the tiny cabin to a junction box on the inside wall. Inside the junction box I would connect the 10-2 wires to 6 gauge wire, which would then enter the load center. @seharper does that sound like a good plan? Is it safe to connect the 10 gauge hot wire from the inlet to two 6 gauge hots in the junction box and run both of them up to the load center so that I dont need to jump or pigtail inside the panel? Thank you for helping me continuously learn!