

I need to make some modifications to a wood fence gate.
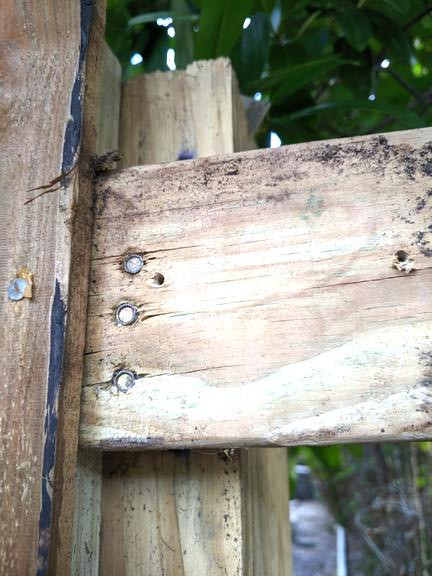
Upon removing the pickets, I noticed the wood rails were fastened to the 6x6 post using 4" long hex headed screws, and since the pickets had to be mounted over them, the installer drove the hex heads all the way in, not just flushed but a bit below flushed.
I have 18 (at least) of these screws to remove. 1/4" hex heads.
![Image]()
Not only they were driven in, the heads on some of them were a bit rounded.
My first attempt was to just pound a socket bit onto the head with a mallet. No go.
Then I manually used a rachet to back them out, I was able to do it with one out of the 18 I needed to do.
After running out of ideas, I took a destructive approach and used a chisel to clear out the wood around each screw. That worked but it was a lot of cussing and I have to replace the rails. But what's done is done.
I would like to know for future references, if there may have been a better way to get them out without destroying the wood rails?
Upon removing the pickets, I noticed the wood rails were fastened to the 6x6 post using 4" long hex headed screws, and since the pickets had to be mounted over them, the installer drove the hex heads all the way in, not just flushed but a bit below flushed.
I have 18 (at least) of these screws to remove. 1/4" hex heads.
Not only they were driven in, the heads on some of them were a bit rounded.
My first attempt was to just pound a socket bit onto the head with a mallet. No go.
Then I manually used a rachet to back them out, I was able to do it with one out of the 18 I needed to do.
After running out of ideas, I took a destructive approach and used a chisel to clear out the wood around each screw. That worked but it was a lot of cussing and I have to replace the rails. But what's done is done.
I would like to know for future references, if there may have been a better way to get them out without destroying the wood rails?


