

First let me start by apologizing if this is the wrong forum.
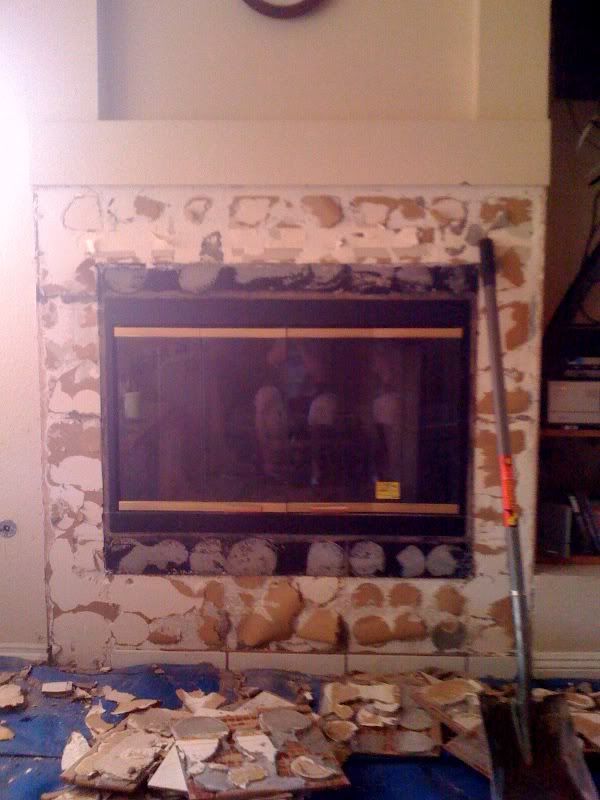
I'm a new home-owner and have decided to replace the old white ceramic tiles around my fireplace with some slate tiles I received from a family member. The fireplace is one of those "fake" fireplaces, with a gas line and ceramic logs in it. It is constructed of metal and seems as though the whole unit is screwed to the framing around it. Behind the ceramic tiles was DRYWALL. Of course when ripping out the old tiles, the drywall became a bit ripped up so, my question is as follows:
Is drywall acceptable to thinset slate to? Can I leave the ripped up drywall? If not should I replace it with drywall or cement backer board? Any other suggestions that I have not thought of would be greatly appreciated as well.
Here is a picture:
![Image]()
I'm a new home-owner and have decided to replace the old white ceramic tiles around my fireplace with some slate tiles I received from a family member. The fireplace is one of those "fake" fireplaces, with a gas line and ceramic logs in it. It is constructed of metal and seems as though the whole unit is screwed to the framing around it. Behind the ceramic tiles was DRYWALL. Of course when ripping out the old tiles, the drywall became a bit ripped up so, my question is as follows:
Is drywall acceptable to thinset slate to? Can I leave the ripped up drywall? If not should I replace it with drywall or cement backer board? Any other suggestions that I have not thought of would be greatly appreciated as well.
Here is a picture:
")


